I have redesigned the pickguard in my Siracusa 16R models. I extended it, substituted a slide switch for a smaller unit with several times larger life expectancy (mechanically and electrically) and changed the way it connects to the preamp board inside the guitar. [Note: I wrote this a few months ago, but it has changed since then to include the Enhanced Single Coil feature, explained here, pages 13 and 14. I have updated what follows to show these changes – April 6, 2024]
I’ll show how I make them in several parts, and this is chapter one.
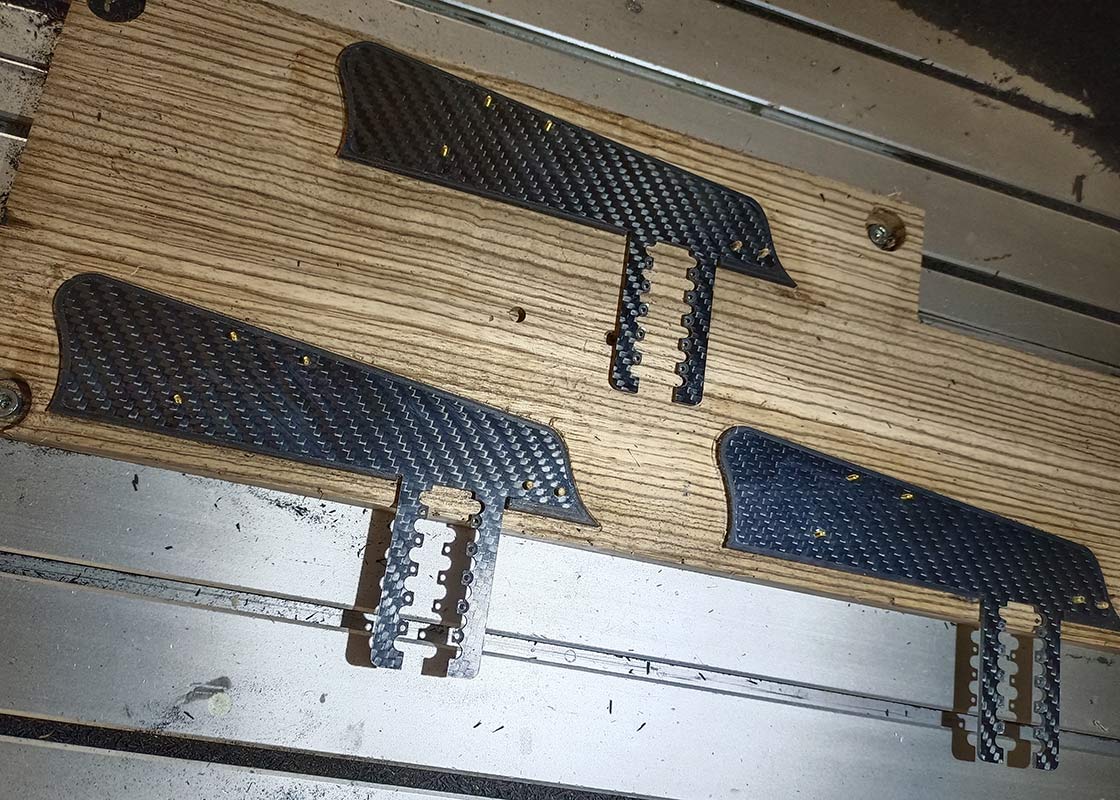
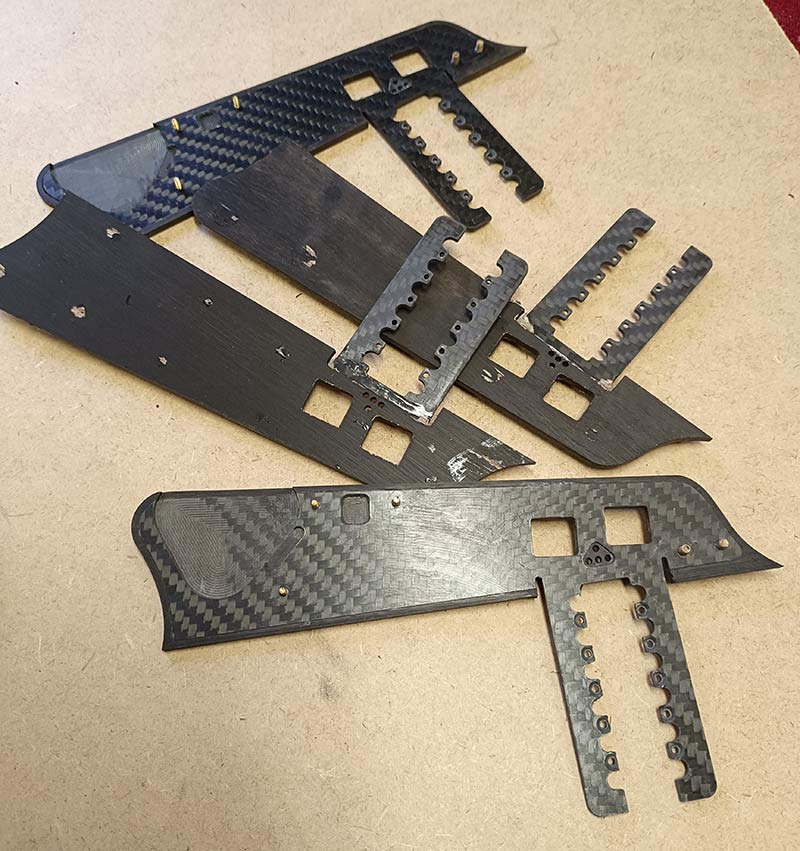
These are the carbon cores that stiffen the pickguards:
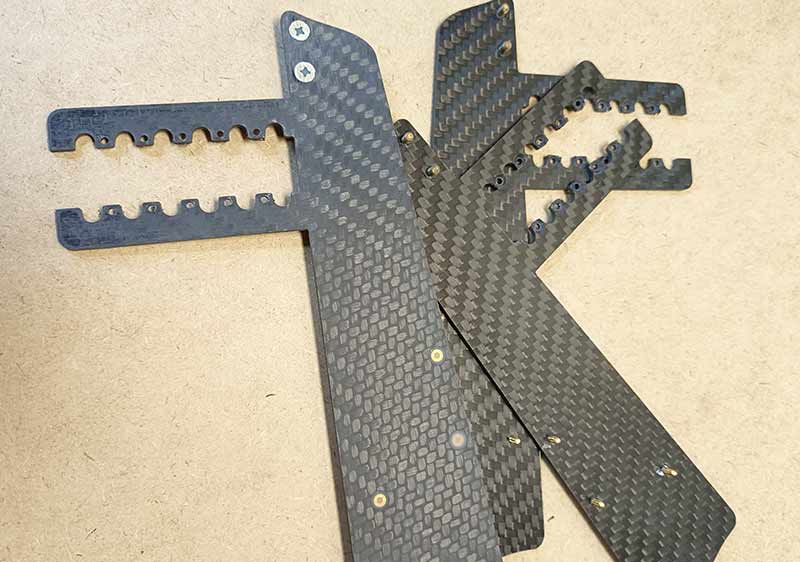
I have added some screws in countersinked holes. Two of them, the larger ones, join the pickguard to the guitar.
These are pieces of ebony cut from peghead overlay stock. They will make the external skin of the pickguard:
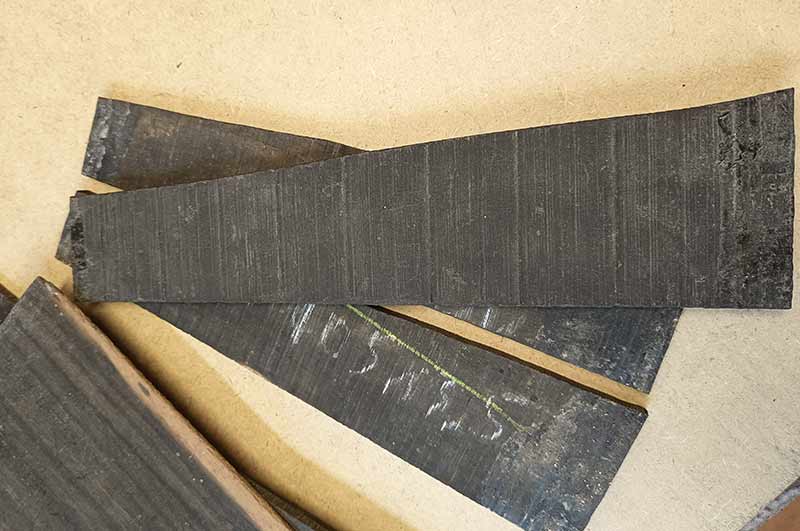
Dry ebony in narrow pieces is sufficiently stable, so I use it here without any problem.
I prepare my CNC for the cut:
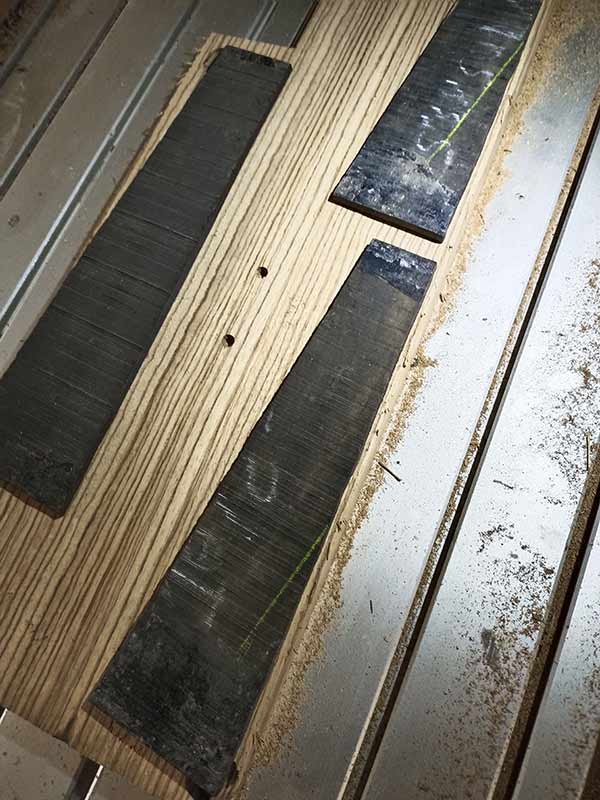
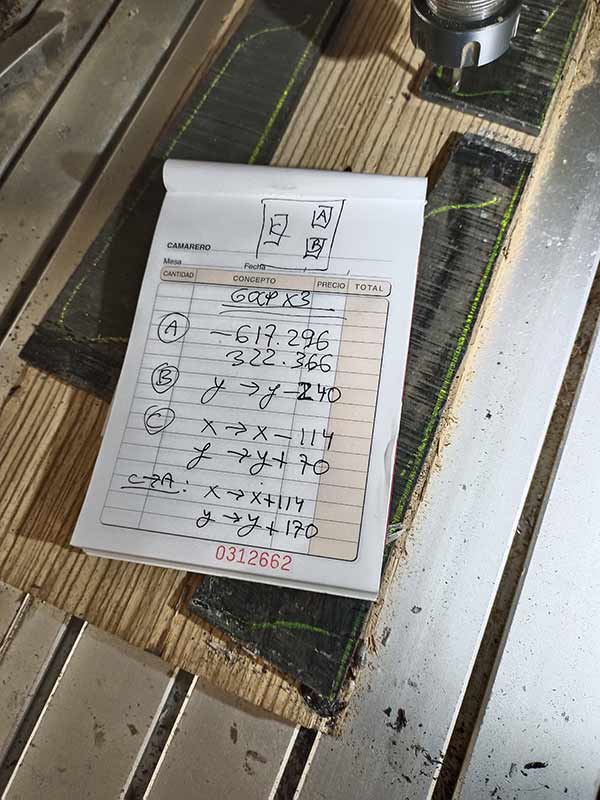
Keeping notes is a must when you are making several pieces in different parts of the table:
First step: a cutter sets the thickness of the pickguard and cuts a recess for the carbon core.
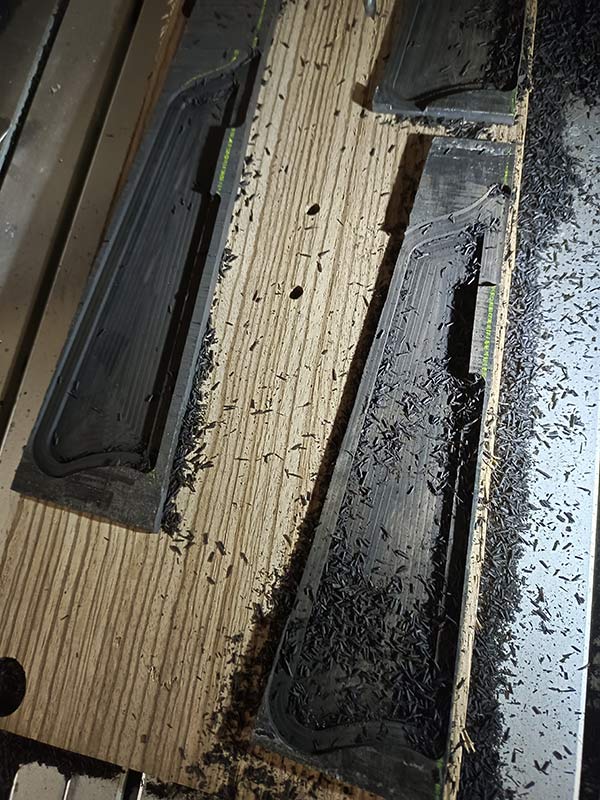
Second step: a smaller cutter cuts the contour:
Next, the cores are glued inside the cavities:
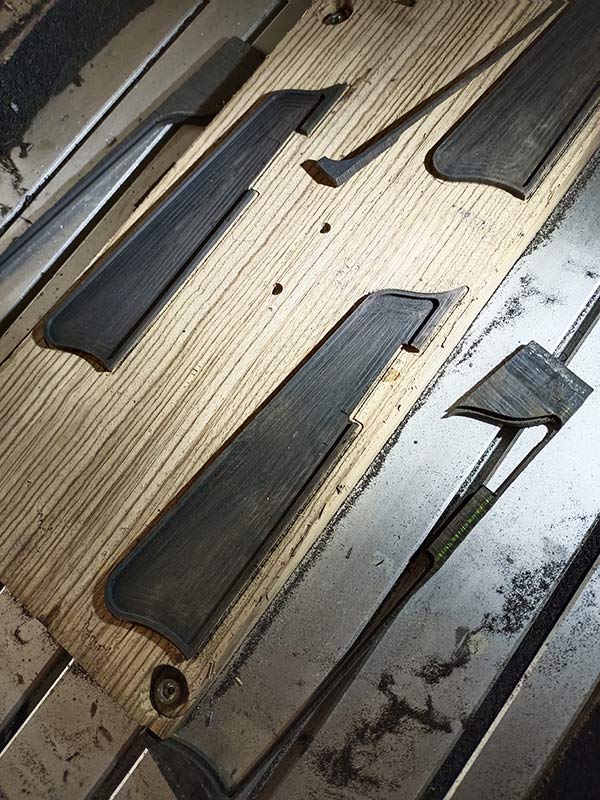
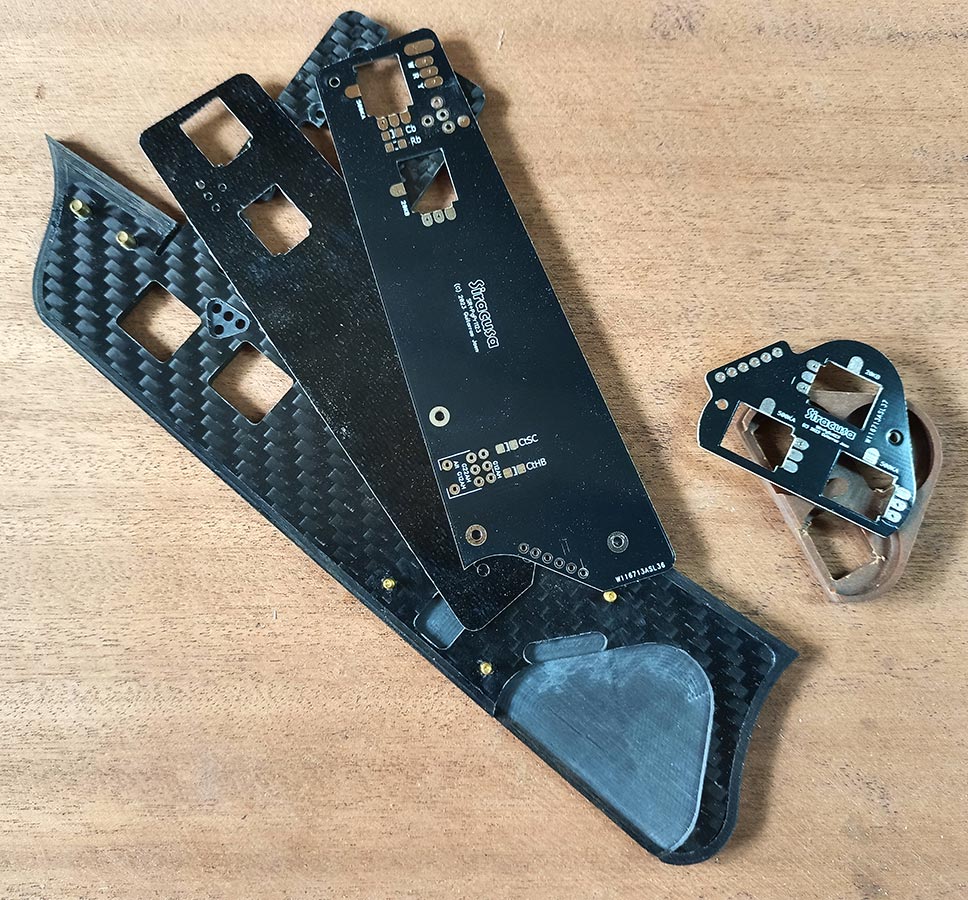
These are the pickguards after leaving the CNC machine. Note that there was a last cut, not shown on the CNC table, where two windows for the pots were open, and also some cavities for the other components.
In this first chapter I will explain also the primary and secondary boards.
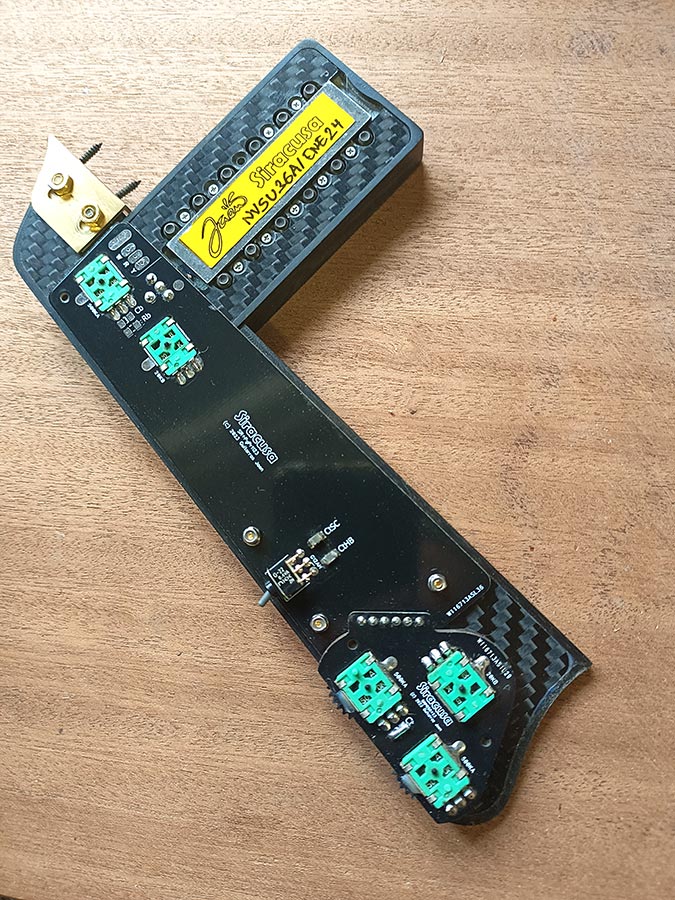
This is the primary board on top of the pickguard body. They are quite simple. I have tried to keep all the traces on the back side, so they are shielded from both sides: from above, with the PCB copper pour that goes connected to ground, and from below, with the grounded carbon fiber that is reasonably conductive.
Note that there is not a connector as there was for the old design. Instead, the wiring coming from the preamp is soldered to the pads, close to the neck (“W R Y”). That is another improvement for my new Siracusas: the wiring goes through the neck block and the bottom of the neck extension; I’ll try to write something about that in the future. There are two tone capacitors (labeled CtSC and CtHB) for Single Coil and Humbucker modes, which is another improvement for the Enhanced Single Coil feature.
Notice the thin fiberglass shim between the PCB and the pickguard. It separates it from the carbon fiber skeleton, because carbon fiber is conductive and will cause short circuits quite easily. There is also a small shim right where the pickup terminals go through the pickguard (not shown).
The secondary board goes above the bakelite piece that you see on the right. Then I make these pots with thumbwheels:

Those pots are long life. Making and installing them in those bakelite pieces is a complex process that has taken me a lot of time and redesigns. I use several jigs for that, but the result is fantastic:
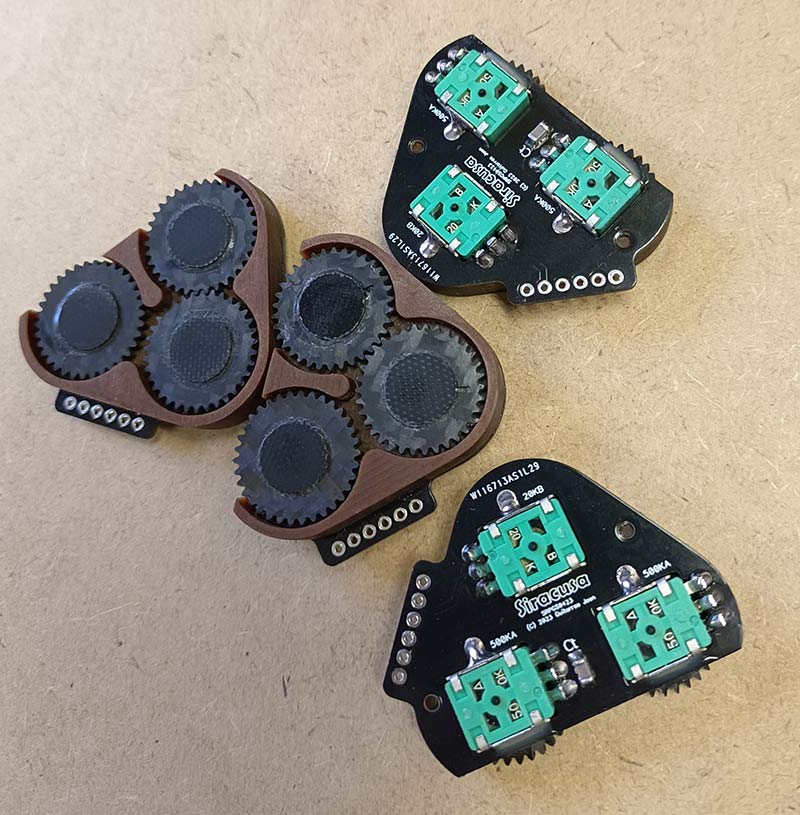
There is a pot inside that is not accessible to the player directly; it moves because it is geared to a second pot, as you can see. This makes a slim master volume control, that modifies both the magnetic and the piezo outputs of the guitar at the same time without mixing them. Finally, this is the finished pickguard, the latest version to date (April 6, 2024):