
Note (January 2021): This content was published (with some modifications) in issue #141 of the prestigious magazine American Lutherie.
Some of my guitars are very light. On these, I must refine my building techniques to guarantee that they have a long life without problems. Recently, I devised a new technique for making the side lining of these instruments that will make them stronger. I liked it so much that I’ll use it for all my models. To my knowledge, no one has done this before, so I am happy to share it with the guitar making community!
Side Lining techniques
The sides of a guitar are made of very thin wood, usually around 2 mm thick. When the top and back are glued to them, there must be a way to increase the gluing area, as these 2 mm are clearly not enough. A lining must be added, and this takes three forms:
- Strips of kerfed wood, known as kerfed linings or kerfing. This is the variety that can be found on most guitars:
A more elegant technique puts the kerfs inside (reverse kerfing):
Kerfed linings can be installed fast, but tight curves must be treated carefully, as the kerfless side needs to be heat-bent to avoid breaking. Other times, some kerfings need to be deepened or widened to accommodate the bend.
- Strips of solid wood lining are used on many classical guitars, usually only at the back/sides joint. These strips need to be heat bent, the same as the sides, to avoid breaking.
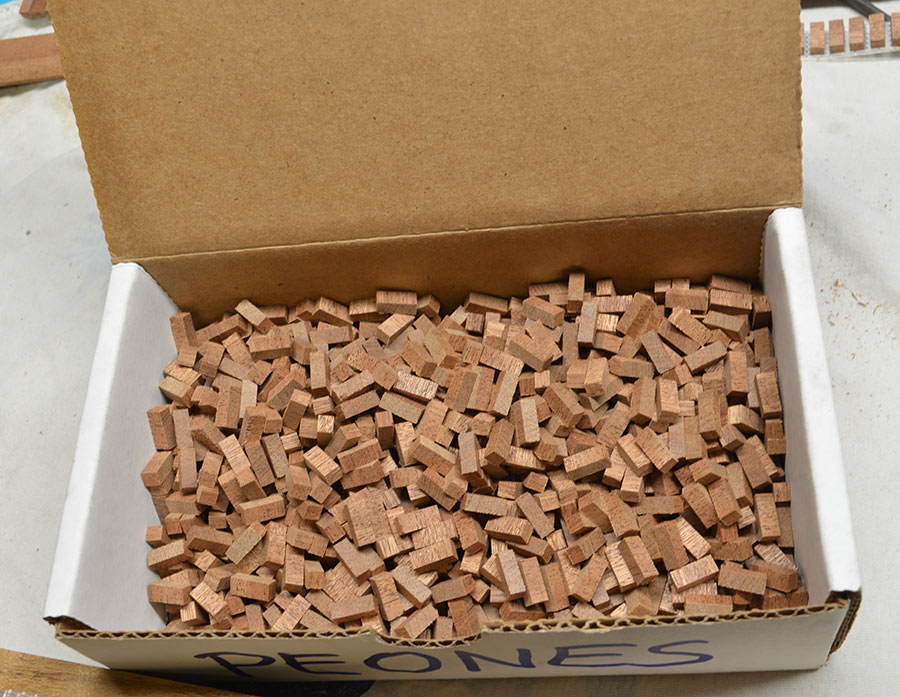
- The third technique is to use what Spanish guitar makers call peones (or dentellones). These are small pieces of wood that are glued one by one. They are used when the guitar is built in the Spanish tradition of the solera, and it is done usually only for the top/sides joint. The result looks similar to the photo of the conventional kerfing above, although gluing them takes more time.
These methods differ in many aspects, but we’ll center on one: the strength that they give to the sides. But, before that, we must analyse how strong sides can protect the plates (top and back) of a guitar.
Loads in a Guitar Soundbox
Guitar soundboxes (we will forget the neck for this analysis) are subjected to several loads:
- Those generated by the strings. They are considered more or less constant (not so if the strings are removed from time to time, or in other situations). The result of these loads on the soundbox is complex to analyse, because it is not composed of some independent effects; instead, it is a complex equilibrium where all the parts of the guitar participate. If we tried to describe this equilibrium as a composition of stresses and deformations, we would mainly consider (remember we are talking about archtops) a longitudinal compression of the top, some longitudinal tension at the back, another top compression caused by the bridge pressing on it and some bending of the whole soundbox around an axis more or less parallel to the bridge.
It’s the maker that must take into account these loads, both in the design and construction phases: angles, thicknesses, reinforcements…
- Those generated by the materials. Wood is used for guitars more than any other material, and it is not a very good choice for stability if humidity is not kept constant. A lack of humidity can break guitars easily, we all know it. Even if you protect your guitar from humidity extremes, constant changes around reasonable values can cause stresses that provoke wood fatigue. This phenomenon is not as predictable as in metals, but it exists and there are studies on the subject. With time, fatigue can be the source of unascertained damage.
These loads are the responsibility of both the maker and the owner. The maker must build with materials in equilibrium, in humidity controlled environments. The owner must keep the guitar in an environment not very different from that where the guitar was built.
- Those generated by use, mainly due to pressures applied by the guitarist while playing. Without any doubt, you can break a thin top simply pushing hard on it. This is out of the question — you don’t even need to push on the top to play a guitar. What I would like to emphasize is the fact that you can also crack a guitar top by applying too much pressure not on the top, but on the sides. You can break the sides also, but the top is very fragile as it is made of thin and soft wood (especially crossgrain). As with humidity, there can be catastrophic failures. For example, you could crack a top by leaning on the side of the guitar while picking up something (a pick…?) from the floor. But you can also generate fatigue by applying the weight of you arm repeatedly on the sides, which results in stresses not only on the sides, but everywhere in the soundbox.
These loads are usually forgotten. However, they are the reason for many cracks of uncertain origin. They can be avoided by playing without applying too much pressure on the instrument, but this is not always feasible. A more realistic way of protecting the guitar soundbox from these loads is to make its sides stronger.
Strong Sides
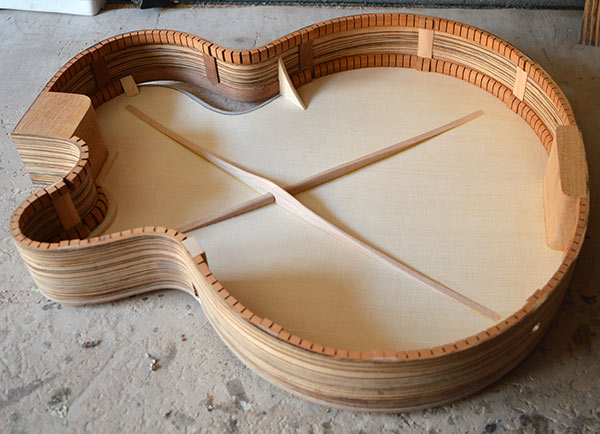
Imagine that you have a side with some peones glued on it, as in (1):
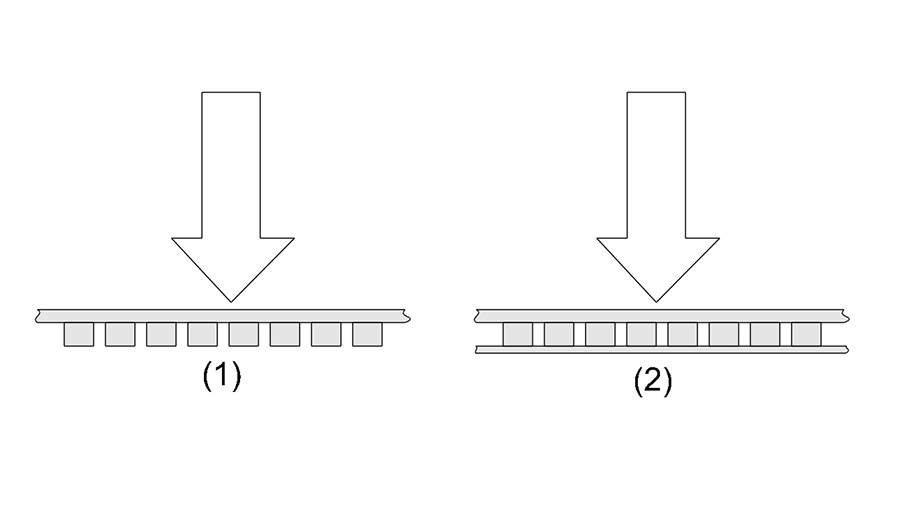
Place some vertical compressive load on the side, as shown, and you’ll see some stress at the glued joints and at the sides, a little more between the peones. If you apply more pressure, you’ll eventually break the glue lines, the peones or the sides. Most of us guitarmakers intuitively know that the arrangement (1) doesn’t improve a lot the vertical load carrying characteristics of a side without any lining, but it can also be shown by structural analysis that, in effect, it doesn’t (we won’t do it here).
Now glue a solid strip to the bottom of the structure in (1), as shown in (2). When you place some compressive load again on the side, as shown, you’ll see that the added strip is now in tension, which means that the efforts inside the structure tend to stretch it. It can be demonstrated that this arrangement is very effective to increase the load carrying characteristics of the structure. It works better when the peones are thicker, separating the side and the bottom face even more. In fact, it is possible to recognize some kind of H-beam structure, which is not the case as there are many differences, but the reader who knows some beam theory will be able to see some interesting similarities.
The structure (2) looks a lot as reversed kerfing, so you can expect that this technique leads to strong sides. However, that is not always the case for all their length. As mentioned above in the description of the technique, it is quite common to saw the kerfs to make them deeper, so that they don’t break in high curvature areas. Also, it is usual that the solid wood between the kerfs is in fact more broken than bent in these narrow areas, perhaps sanded and made up to look flawless. Then, when the sides have their reverse kerfing installed, you can feel that they are stiff. Which means that they don’t deform a lot when you press on them, but that doesn’t mean that they are strong. If you compress the sides a little more, you’ll soon discover that the kerfing will break at some of the weak points where the kerfs have been deepened or bent with damage to the fibers. I have seen this happen with a loud bang, explosively. It gives an indication of the tension that was supported by the solid part of the kerfed lining.
The Technique
I have built guitars with strips glued to the reverse kerfing at those areas where it has been weakened for the reasons mentioned. Also, at the areas where the player is expected to press more with his body. However, all this adds complication. I came to the conclusion that the best thing to do was exactly what is shown in (2).
So I make peones, all the same size. They are straight, not triangular as most conventional peones. What I do is to prepare strips of section 4×11 mm. The technique for making these is straightforward, so I am not going to explain it here. After they are made, I pile up a few together with some masking tape — six here:
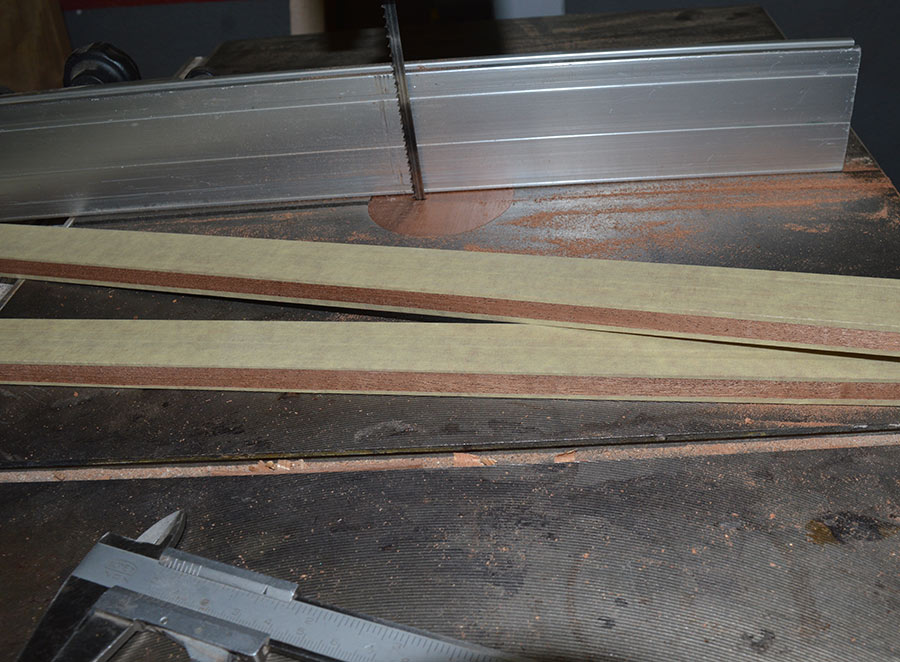
And then I cut them in a simple table saw that I use exclusively for this:
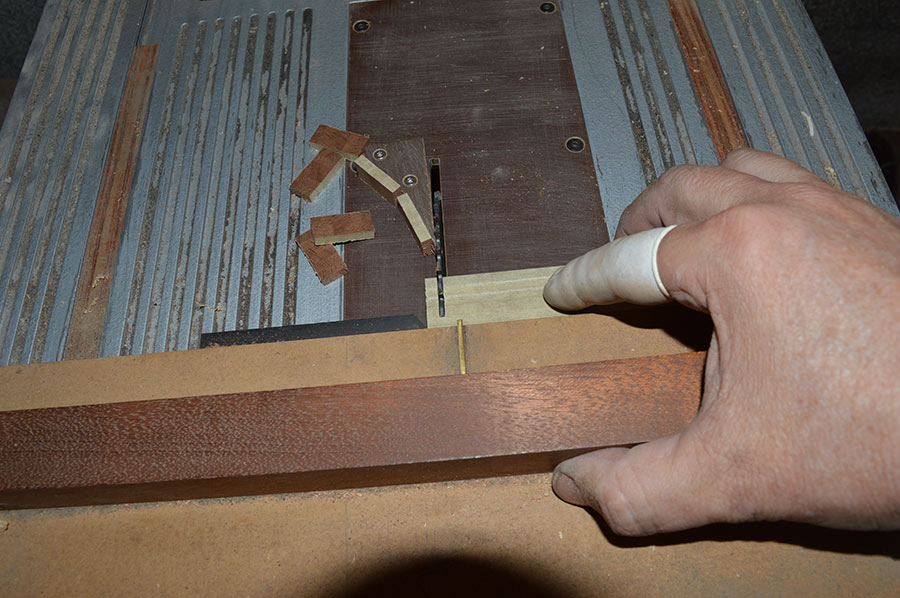
Without the tape, they jump all over the place, and many are broken. Each cut makes several identical peones joined by tape:
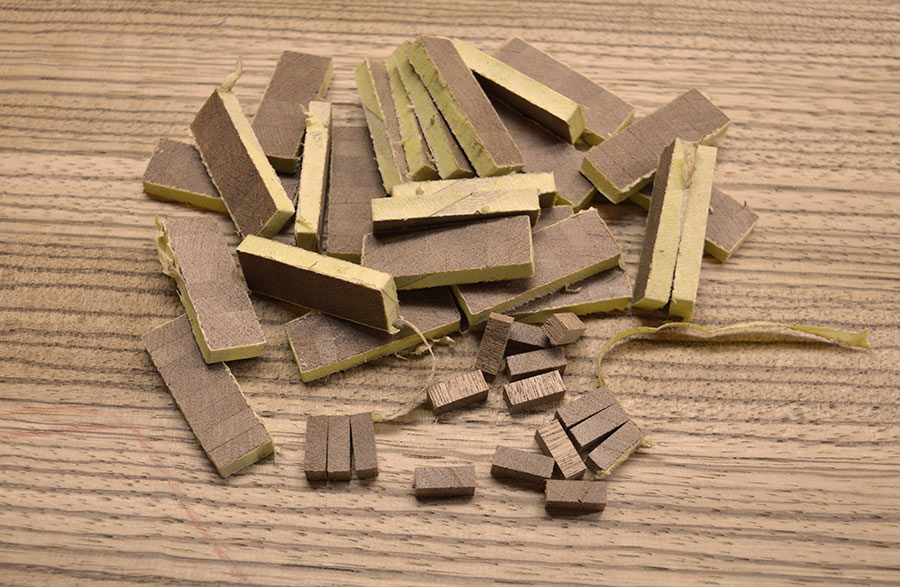
It takes half an hour to make hundreds.
I used my CNC to make a jig for joining them, in bakelite:
This has cavities for placing the peones like this:
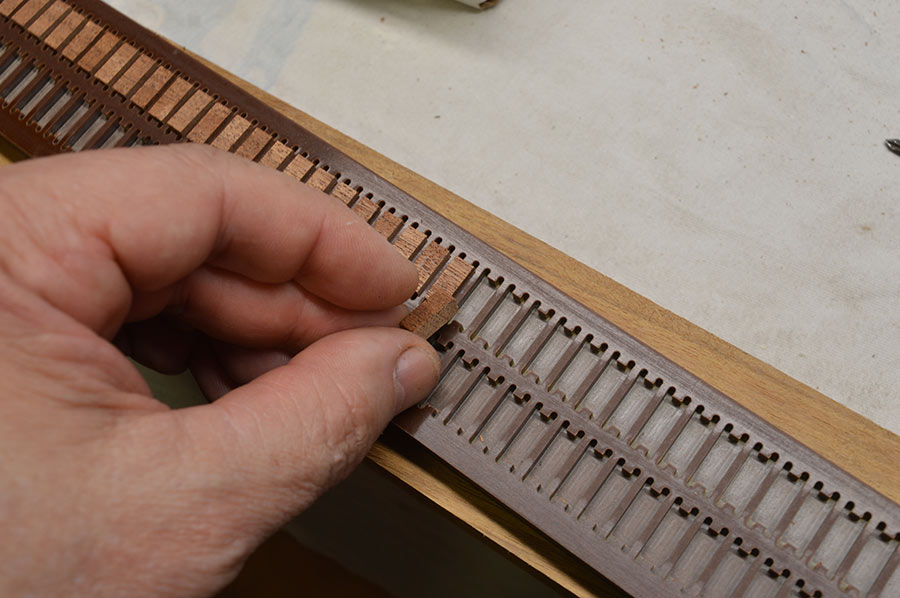
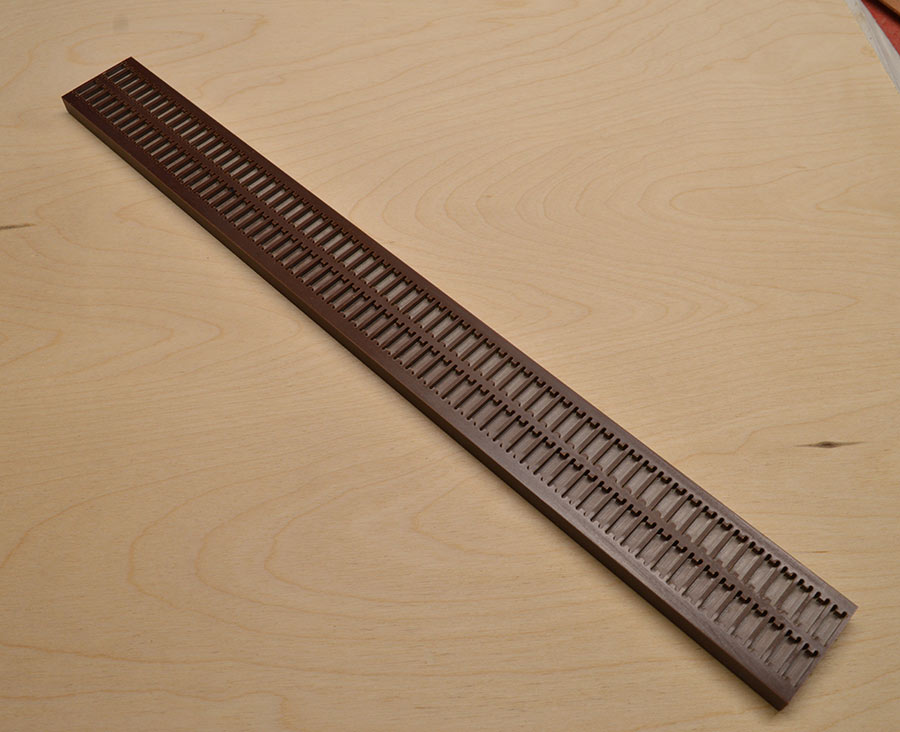
When a row is finished, I put strong tape on the peones to make a strip that I can use anytime:
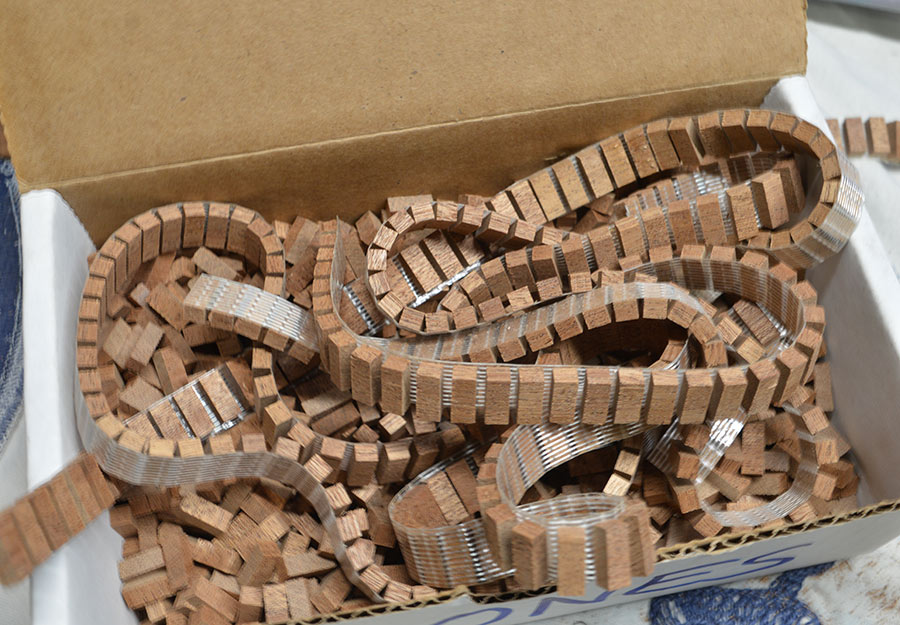
I can make them as long as necessary, as they can be “soldered” with precision using the jig and some tape.
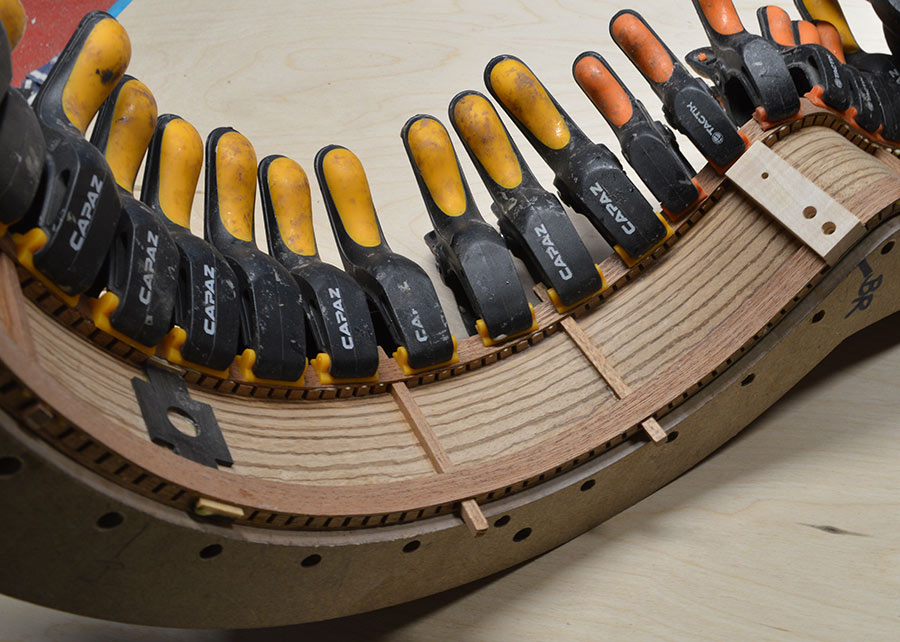
Gluing the strips:
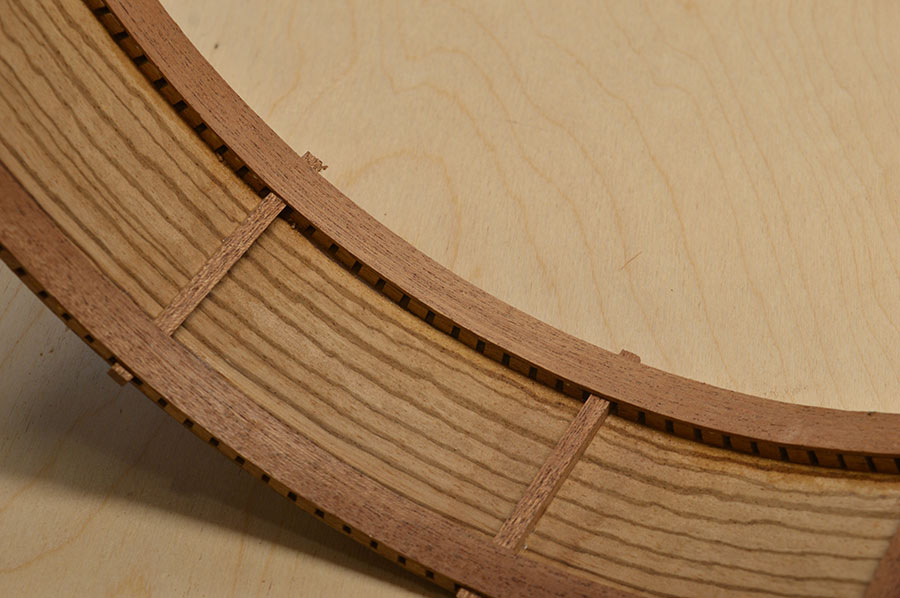
Glued strips, after removing the tape:
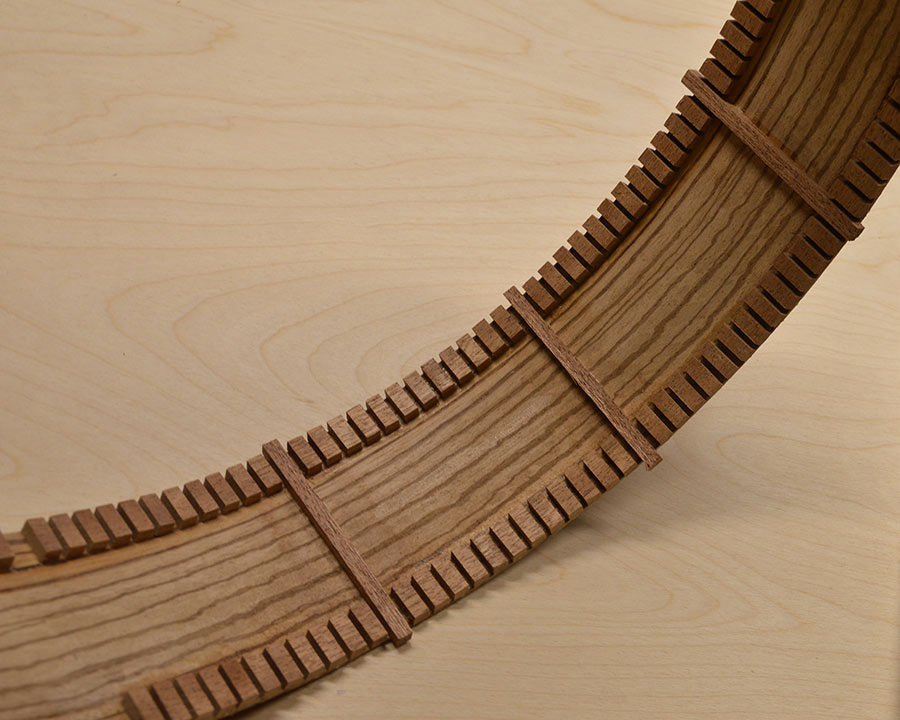
I use those reinforcements that are the same size as the peones (although their grain directions are at 90º). They don’t leave weak spots at the sides, so I like them (I mean, if a crack developed anywhere along the width of the side, they would stop it from propagating). And, as the location of each peón is so precise, I can leave some peones out where the reinforcements will be, and both strips will align and match perfectly later.
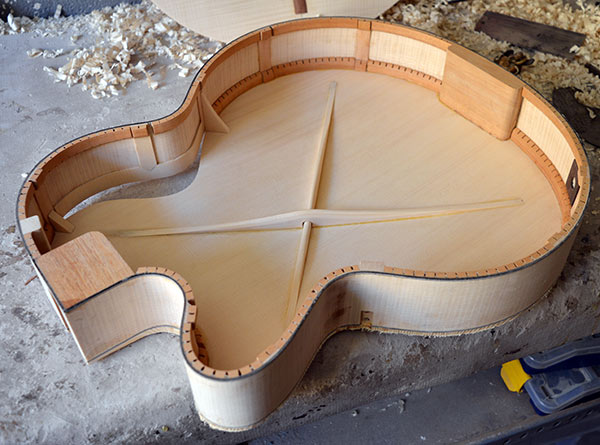
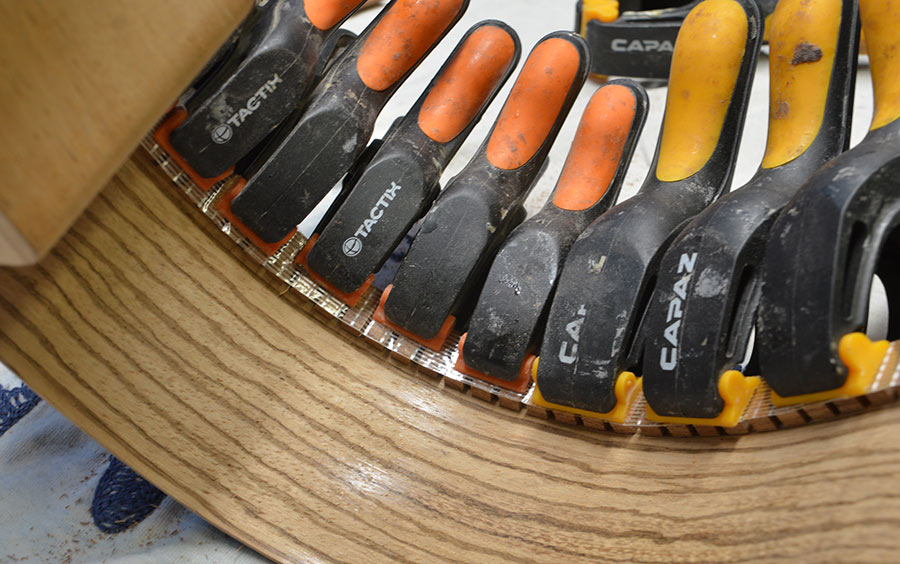
After that, I bend some strips, 11×1.2 mm and glue them to the peones:
Checking the strength with a Stanley #6:
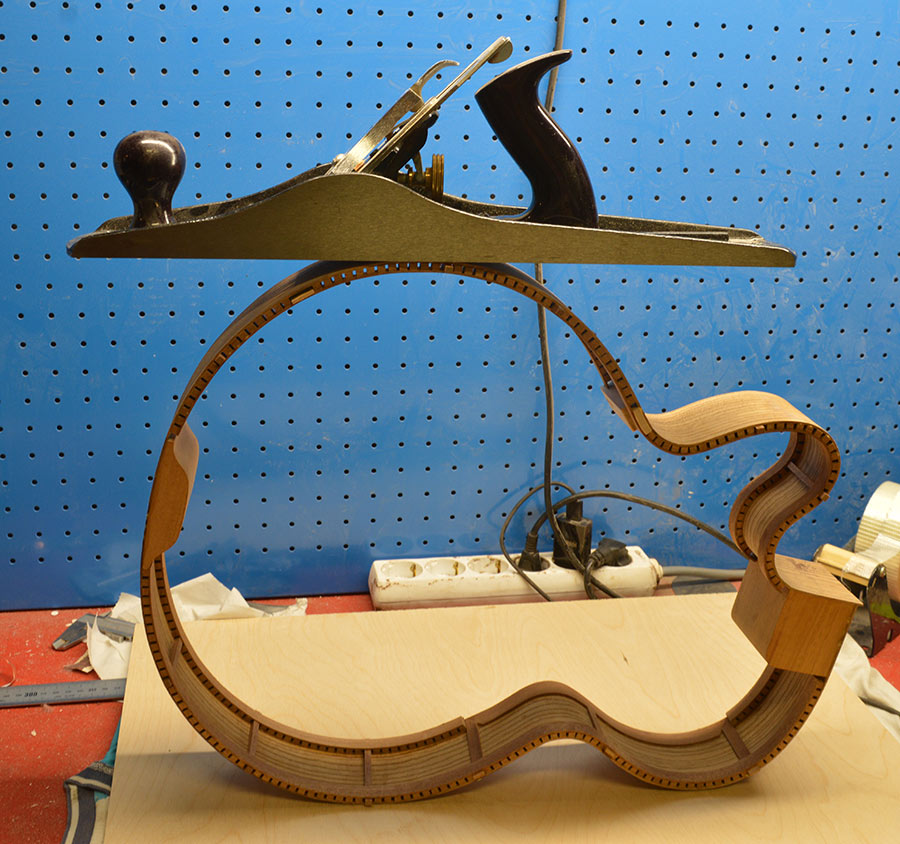
The surface of the peones is enough for gluing the top and back to the sides. The reinforcing strips are scraped at an angle so that only the peones touch the top and back.
This system has some added benefits, that I discovered later:
- The distortion is minimal, even with the sides out of the mold. With the usual methods, the bent sides must be used soon before they change their shape.
- The sides are so strong that the sanding of the linings to leave them level with the sides is much simpler. It can be done even with the sides out of the mold. With conventional methods, the sides must be kept inside the mold, well clamped to it so that the sanding process does not move them away from the mold surface.
